• Skip to primary navigation
  • Skip to main content
  • Skip to primary sidebar
  • Skip to footer
Grower Today
  • Home
  • Soils & Plant Nutrients
    • Composting
    • Soil Amendments & Fertilizers
  • Organic Pest Control
  • Natural Weed Control
  • Organic Food
  • Hydroponics

Are Pine Needles Good for Compost? 

September 19, 2019 by Josephine Brown

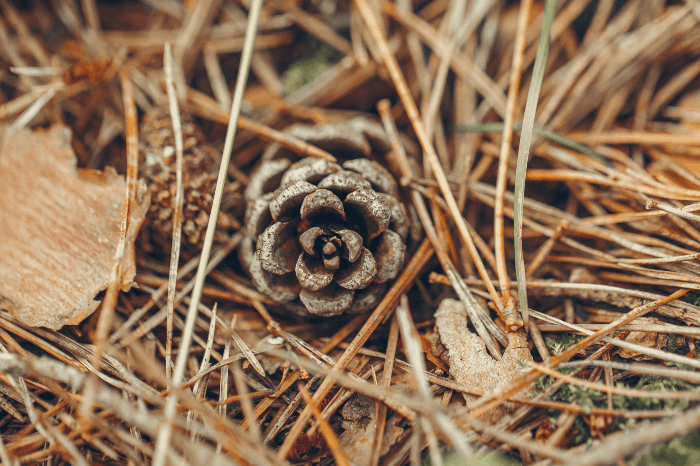
Pine needles are abundant in nature and found in all parts of the world. They are a rich source of organic matter and are usually added to a compost pile or used as a side mulch. The best way to get the maximum result from adding pine needles to your compost is to ensure that other materials are present in the right proportion. 

One of the reasons why most people are against adding pine needles to their compost is because it decomposes slowly. But pines are not the only materials in your compost pile that take too long to break down your eggshells also take a while to get ready.   

Before we get into how best to compost pine needles, let us first find out how safe it is to include pine in your compost. 

Are Pine Needles Good for Compost?

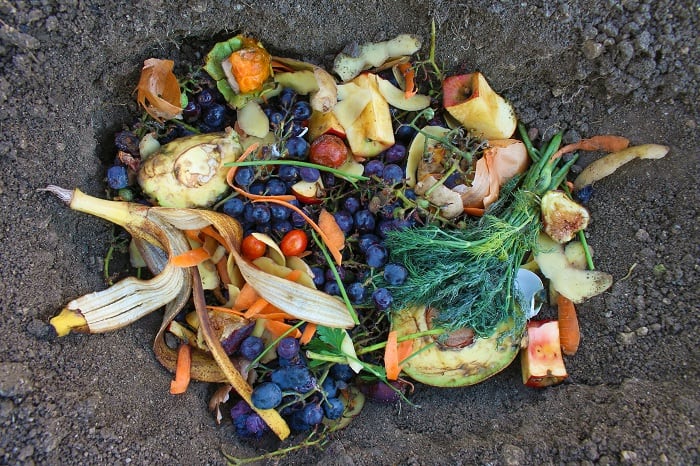
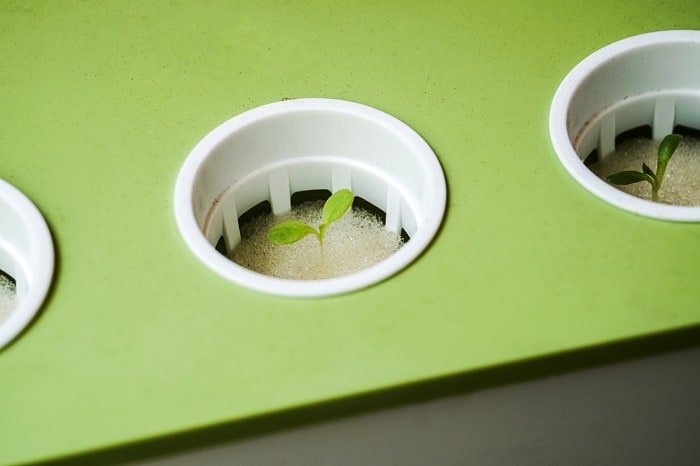
Composting allows you to convert kitchen waste into pure nutrients for garden plants. So if you do have indoor plants or a front lawn, you may want to consider setting aside your kitchen scrap for the compost bin. Not all materials are compostable, before adding any household waste into a compost bin, you need to confirm that it is organic. What this means is that you cannot include any synthetic material made from chemicals and other additives.

Are Pine Needles Good for Compost?

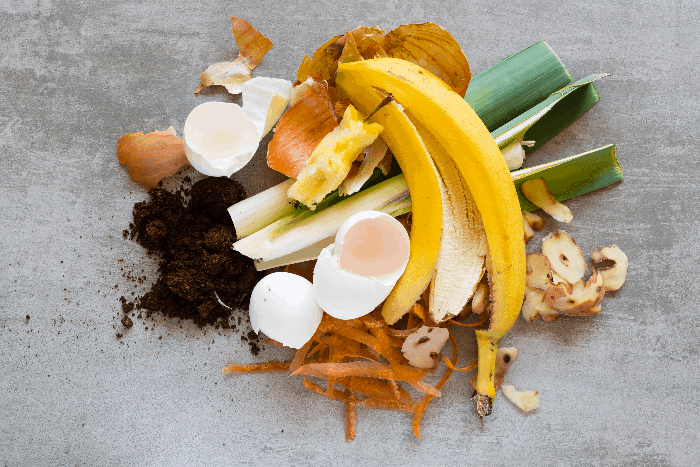
If you look through your trash can, the chances are that you should be able to find organic materials that you can include in your compost bin. 

If you happen to have pine trees growing in your yard, or close to your garden, you can collect fresh pine needles and add them to your compost pile. 

Some people believe pine needles to be acidic and alter the pH level of the soil when added to it. The truth is that the pH of pine needles ranges between 3.2 and 3.8 when freshly collected, but after composting, it loses all its acidity as a result of the other materials in the bin. 

Pine needles are good for compost as they are a rich source of carbon for your compost. Their acidic nature makes pine a good addition to the soil of acid-loving plants. Examples of plants that do well in acidic soil are raspberry, rhododendrons, gardenias, and strawberries. So if you have them planted in your garden, you can add in some pine cones or needles next time you make a compost pile. 


Composting Pine Needles

A lot of people with a pine tree in their garden don’t bother to rake or clear the fallen leaves. They leave them on the ground to act as mulch for the tree. There is no problem with this method if you are not interested in a compost pile. One good thing about pine needle is that they don’t litter the place when they fall. So you can leave them without worrying about the mess. The pine needles break down slowly and add nutrients to the soil for reabsorption by the tree. 

Are Pine Needles Good for Compost?


But if you are interested in making a compost pile with some pine needles, the process is relatively easy. All you need is to 

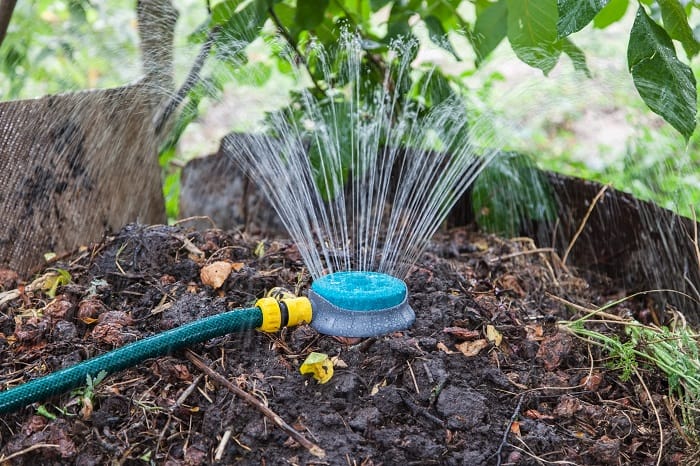
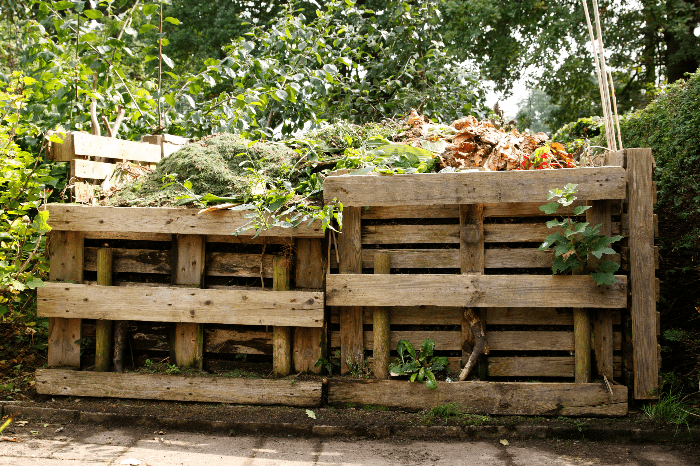
1. Get a compost bin. You can find one to buy or construct one yourself if you can. The compost bin needs to be large enough to fit all the materials you toss inside. It doesn’t have to be too tight, it also does not have to be spacious. The right bin should fit all the materials you put inside it and be spacious enough to allow air to circulate. You have to consider this if you want your compost to be ready quickly. 

2. Once you have acquired the right size of the compost bin, you will then need to collect some fresh pine needles. Collect as much as you can and then shred them into tiny pieces. You can do this by running your lawnmower over the heap of pine needles several times. Shredding is an important part of composting. All materials you add to your compost pile need to be broken down. You need to do this if you want the compost to be ready quickly. 

3. You first need to throw in some grass clipping or vegetable peels to the bottom of your compost bin. The clippings and plant waste need to reach up to 8 inches in the bin. The next step is to sprinkle water on the clippings. You need to be careful to ensure you don’t soak them in water. 

4. You can then add your freshly chopped pine needles into the bowl. You want to be careful to avoid using too many pine needles in your compost bin. Pine needles shouldn’t be more than 10% of the materials in your compost bin. Add 3 inch of pine needles to the 8 inches of grass clippings already in the bin.   

5. Add in some water to the pine needles as you did with the grass clippings. 

6. Once the pine needles are moist, the next step is to include some horse manure into the mix. You can make use of chicken or cow manure if you can access horse shit. 

7. After adding the manure, you can now water the pile again like you did when you added the grass clippings and the pine needles. 

8. You will need to repeat the process of adding grass clippings and pine needles if those are the only materials you are composting. Other materials such as kitchen waste, cardboard paper, and wood chips are equally good compostable materials. 

9. After filling your compost bin with the right materials, you need to keep it in a section of your garden with direct access to sunlight. This way, the materials can get heated and decompose quickly. You also need to ensure you turn the pile regularly so as the materials can get access to air and heat. When you follow the right composting practice, your compost pile should be ready for use in a month or two.

Are Pine Needles Good for Compost?

If you are composting indoors, you can make use of compost tumblers instead of bins, they are safe to use in your apartment building. You can also make use of them to compost your pine needles and kitchen waste if you like to reduce food wastage.

FAQs

How long does it take for pine needles to compost?

It depends on the type of pine, how much you pile, and how much water you give them. It will also depend on the amount of organic matter in your soil. The longer the pine sits, the more beneficial.

This also helps reduce the risk of diseases like black spot. 

Are pine needles good for garden beds?

Pine needles are actually a very valuable and useful part of the landscape, so here's the scoop. Pine needles are the leaf buds of pines. They are produced during the spring and summer months as the trees begin to grow new leaves. As the needles fall to the ground, they may be harvested and used as mulch or even as firewood.

They also make a great soil amendment for your garden beds. Pine needles have several advantages over other types of mulch. First, they are easy to use. Simply rake up the pine needles, and they'll add organic matter and nitrogen to your soil without adding bulk. The pine needles break down into humus quickly, so they don't require much attention after you've added them to your garden beds. The needles are also free from diseases and pests that can affect other types of mulch.

Pine needles aren't just useful as a mulch; they can also be used to control plant diseases and insects. Since pine needles are an excellent source of nitrogen, they can help promote healthy root growth and help plants tolerate drought and other stresses.

What plants can I use pine needles on?

Pine needles are an easy way to add a little extra color and texture to your garden. Not only will they provide some of the nutrients your plant needs, but they also help keep the soil cool in hot weather. You can find pine needles at most gardening stores, and they’re usually used for landscaping purposes (rather than food).

You can use pine needles as mulch or you can spread them around your garden. Pine needles provide a lot of nutrients for plants, and they’ll help your garden stay healthy and attractive. As long as you don’t let the pine needles get too wet, they’ll be fine. Pine needles are an easy way to add a little extra color and texture to your garden.

Is pine mulch good for vegetable garden?

Pine mulch is just another option, not necessarily the best one, but if you have to use something you should make sure it's safe for your plants. Pine mulch is not as effective as wood mulch because the nutrients from the pine mulch leach out faster. Some people like it because it looks pretty in their flower beds, but it may not be worth the cost.

Filed Under: Composting Tagged With: are pine needles good for compost

Best Reverse Osmosis System for Hydroponics 

September 18, 2019 by Josephine Brown

Growing plants in a hydroponic system will require water. For your garden plants to grow healthy and disease-free, they will need to get access to clean water. A reverse osmosis system guarantees that you will never run out of pure water in the garden. 

Finding the best reverse osmosis system for hydroponics can be a bit of a snag, especially if you don’t know what to look out for when shopping for one. 

Your plants aren’t the only ones to benefit from a water purification system, a new unit in the home, will also be of benefit to you. Before we get into our best selections of a reverse osmosis system, we will like to share with you our buyer’s guide and frequently asked questions. So you can be well informed to make your choice. 

Buyer’s Guide

Knowing the features to look out for when shopping for a new reverse osmosis system for your garden will save you from ending up with a product that you will regret buying. 

When shopping for a reverse osmosis system, you want to look out for 

  • Amount of Water Used 

The amount of water that gets wasted is one of the things you want to consider in your water purification system. In commercial hydroponic systems where seawater is used, you will need a large amount of water to reduce the salt that gets into the grow bed. 

Best Reverse Osmosis System for Hydroponics

Newer models of the reverse osmosis system make use of a little amount of water, thus saving you the extra cost on the water bill at the end of the month. 

  • pH Level of the Unit 

The pH level is also one feature you want to look out for when shopping for a reverse osmosis system. Most reverse osmosis systems work by reducing the pH level of the incoming water; this means that they can work with water from any source. 

The reduction in the pH levels of the water changes its taste. While it is safe to drink, you might want to use a remineralization unit to add minerals to the water that can influence its taste. 

  • Installation of the Unit

You also want to consider if the unit is easy to install. Most of the home units can be put together by following the manufacturers manual, so you may not need the services of a professional. You want to make sure that you will not be making additional expenses since the best units are usually on the high side. Before leaving the store or completing your online purchase, you should check that all the equipment for installation is in the unit. 

Best Reverse Osmosis System for Hydroponics
  • Taste of the Water 

All reverse osmosis system aims to improve the quality of water. You need to ensure that the water is safe to drink and use for cooking. Even though you are purchasing the unit to use in your garden, and will not be drinking from it, you want to ensure that it does not taste funny. 

It doesn’t matter the brand or how much the unit cost, water purification systems were designed to make water taste sweet. So you should expect nothing less.  

  • Purification Stages 

You also need to take into consideration the different stages of purification. Most units are designed to provide up to seven purification stages. The number of purification stages doesn’t necessarily affect the quality of water. So you should be okay with a product that offers at least five stages of purification.  

  • Amount of Sediments 

The TDS or Total Dissolved Solid measures the number of sediments contained in drinking water. The common sediments include organic minerals such as chlorides, sulfates, magnesium, and potassium. A good reverse osmosis system should be able to remove more than 90% of sediments from your water. 

Reverse Osmosis for Hydroponics FAQs 

  • How Does Reverse Osmosis System Work? 

The working principle of water filtration systems differs depending on the design. Most reverse osmosis systems are designed with extremely tiny pores for the passage of water only. The filtration is made possible with the help of the membrane that helps to keep out the sediments and impurities. 

  • Do You Need a Reverse Osmosis System for Your Drinking Water? 

The truth is that there is nothing wrong with drinking tap water, especially if it is from a clean source. The decision is left to you since there are many cheaper options for a water purification system. A tabletop water filter can be used to improve the quality of water in the home. A reverse osmosis system will be a better addition if you have an indoor water garden. This way, you and your plants never run out of clean water. 

  • Is Reverse Osmosis Water Safe to Drink? 

Yes, the unit functions as a water filtration system that improves the quality of water. Although the water may be missing some minerals, it doesn’t in any way pose a threat to your health. 

  • How Often Should I Maintain My System 

RO systems are easy to use and require minimum maintenance.  Regular maintenance will need to be done every six months and usually involves changing the water filter or membrane. You don’t need to hire a maintenance expert, you can get the job done yourself without stress. 

Best Reverse Osmosis System for Hydroponics 

Now that we have shed light on what to look out for when shopping for an RO system, and some frequently asked questions, we can now check out our selection of the best reverse osmosis system for hydroponics. 

APEC Top Tier Ultra Safe

APEC is a household name when it comes to quality reverse osmosis systems. The Top Tier Ultra Safe is one of the best products in the collection. The units are designed to be compact and portable, Making it a good addition to your kitchen cabinet. Made in the USA, each unit is designed to meet all the necessary quality checks. It features a chrome coated faucet with stainless steel teeth that prevent leakage in the system. It eliminates contaminants such as chlorine, lead, chromium, arsenic, and toxic fluoride.

Check Price on Amazon
Pros Cons
Portable design  Use up a lot of water 
Fitted with double carbon block system   
Easy to maintain   
Easy to setup   
Durable  
Leak-proof design   

iSpring RCC7

The iSpring RCC7 makes use of a 5 stage filtration system to eliminate sediments and contamination in your hydroponic system. The unit measures at 18 inches which makes it possible to fit into tight spaces. The brass body design of the faucet is lead-free and highly durable. So you don’t have to worry about the unit not lasting long. The 5-stage filtration system eliminates large contaminants and chlorine from the 3-stage filtration. The final stage is where the polishing takes place to add sweetness to the water. The water tastes funny when the unit is newly installed and will take a while for the taste to improve. 

Check Price on Amazon
Pros Cons
Durable  Bad taste
Compact design   
Easy to Assemble   
5-stage filtration   
Easy to Maintain   

Home Master TMAFC Artesian 

This RO system is different from many traditional systems. The fittings and tubings are large and are capable of producing clean drinking water for you and your plant. The 7-stage filtration system is responsible for the quality output that the Home Master TMAFC Artesian is known for. It features a strong carbon-based media that is capable of separating heavy metals and contaminants. The remineralization system helps to balance the pH levels in the water, while the filter is designed to prevent leakage. The only downside of the unit is that it is difficult to change the filters. 

Check Price on Amazon
Pros Cons
Strong design Difficult to maintain
7-stage filtration  
Remineralization system  
Large tubings  
Easy to setup  

Hydro-Logic 31035

The Hydro-Logic is designed to produce up to 100 gallons of clean water daily. So you don’t run out of clean water for your hydroponic system. The unit is relatively easy to set up and does not require any specific tool to assemble it. You can put it together by following the manual that comes with the product. It features a filter system that can reduce more than 98% of contaminants in tap water, providing you with a clean source of water for drinking and cooking. 

Check Price on Amazon
Pros Cons
Easy to assemble Poor filter system
Durable  
Produces 100 gallons of water  
Easy to change the filter  
Wastes less water   

EcoPure ECOP30

The ECOP30 from EcoPure also makes it on our list of best reverse osmosis system for hydroponics. It is made in the USA under strict conditions. It is certified by the National Sanitation Foundation (NSF) for eliminating water contaminants such as chlorine, sediments, lead, and chemicals. It is easy to install and you don’t need special tools to change the filter. It features a led faucet light that illuminates when it is time to change the filter. 

Check Price on Amazon
Pros Cons
Durable Poor-fitting filters
Led faucet light  
Easy to install  
Easy to maintain  

Our Recommendation 

Finding the right reverse osmosis system for your hydroponic unit shouldn’t be a difficult task once you know what to look for in a quality product. You can do this by checking our buyer’s guide and frequently asked questions for any information you may need. You can also let us know in the comment section if we can be of any assistance.

FAQ’s

Which is better reverse osmosis or water softener?

The better option between reverse osmosis system and water softener will depend on your needs. Reverse osmosis will filter your water as well as soften it a little. In fact, reverse osmosis is one eco-friendly filtering system that does not make use of chemicals. 

On the other hand, a water softener will reduce water hardness. When your water is hard, there is a high presence of magnesium and calcium ions. This can cause dry skin and hair, faded laundry, water spots on glasses, and clogged pipes. A water softener will replace calcium and magnesium with sodium ions through the means of ionization. 

Therefore, reverse osmosis will be beneficial to you if your water needs filtering, while a water softener will favor you if your water suffers from water hardness.

Basically, they cannot be replaced by each other. Reverse osmosis system and water softener are simply significant combinations if you want extraordinary water. 

Can I use reverse osmosis water instead of distilled?

You can use a reverse osmosis water system instead of distilled water. The reverse osmosis system filters water through membranes and reverses osmosis water is free of chemical. 

Both reverse osmosis systems and distilled water are used to filter water and provide clean water for drinking. However, only a reverse osmosis system is ideal for residential purposes. 

Distilled water is a procedure of boiling water and condensing back to the water. Distilled water is also a way of purifying water. It is even purer than tap water although people don’t really enjoy drinking distilled water because it has been dematerialized. 

Also, distillation will not take away volatile chemicals as a reverse osmosis system would. So generally, reverse osmosis water is better than distilled water. 

Can I install a reverse osmosis system myself?

You sure can install a reverse osmosis system yourself if you are skillful and have a little mechanical idea. Installing a reverse osmosis system yourself isn’t so difficult or time-consuming. 

However, it’s usually better to trust a professional who has adequate knowledge and experience. If you are not so skillful or have a little idea of mechanical knowledge, you should allow a residential water treatment professional to install it for you. 

A professional will take into account factors such as your home’s water pressure, overall water quality, temperature, as well as the intervals the holding tank to the faucet. All this information is essential for better comprehension of the maintenance needs of your units. 

Do you need a reverse osmosis system with a water softener?

You will need a reverse osmosis system with a water softener because they work hand in hand and are both great combinations for remarkable water. 

A water softener will soften your water. On the other hand, the reverse system will filter the water. Making use of just a water softener isn’t ideal because impurities will still be in your water. Also, making use of only a reverse osmosis system will just enhance your hard water a little. Therefore, having the combination of a reverse osmosis system and water softener is ideal. 

Filed Under: Hydroponics Tagged With: best reverse osmosis system for hydroponics

Worms in Compost: Are they a Friend or a Foe?

September 11, 2019 by Josephine Brown

Composting is the breakdown of organic materials, such as food waste, vegetable scraps, leaves, and plants, to a nutrient-rich soil ideal for gardening. Worm farms or composting worms, or what we call “little helpers”, speed up the process of composting. This process of adding worms in composting is referred to as vermicomposting. 

Don’t confuse yourself with compost worms and garden earthworms; they are totally different. Compost worms prefer to stay in the surface area with a damp environment, and they prefer to eat raw materials. Meanwhile, earthworms want to burrow themselves to the bottom of the soil, preventing them to gain access to raw materials on the surface area. This calls for the need to mix the compost in order to introduce them to a new raw material. 

So, are worms in compost good or bad? Mostly, these composts worms are considered to be a gardener’s friend, and here are the reasons why.

Organic

The end product of decomposition from earthworms is 100% organic. No chemicals were used to speed up the composting process. 

Worms in Compost: Are they a Friend or a Foe?

Introduction of Microorganisms

As the farm worms pass through the compost, microorganisms such as bacteria and other microbes are introduced into the soil making it resilient to diseases and pests in the garden. Microbes in the soil attract birds which help eliminate pests lurking in the garden. 

Good Growth

Gardeners noticed improved growth and a better production because of vermicomposting. It is believed that the earthworms release hormones which make the plant healthier and yield good root growth.

Healthful

The nutrients brought about by vermicomposting are raw which makes it easily absorbed by the roots. Due to worm mucus in the compost, vermicomposts are not easily flushed away, thus allowing plants to gain maximum nutrients from the soil at an extended span of time. 

|

Retention of Water

Vermicomposts can retain more water than ordinary composts. This is beneficial especially in times of drought. While water from normal composts evaporates easily, water from vermicomposts evaporates at a slower rate, thus making it more accessible to plants. 

Free Helpers

Farm worms are excellent free helpers in the composting process. They not only decompose food wastes and organic materials, but they also mix the compost at the same time. 

Here are also some of the reasons why these worms pose as a threat to gardening:

Time-consuming

Approximately, it takes half a year for these worms to decompose the raw materials to make a healthy compost while an ordinary compost can just take three months with constant mixing. 

Foul Smell

The University of Nebraska warns that vermicomposts usually has an earthy smell on its soil. There is also a great tendency that the smell will become too awful if there are certain factors such as too much food wastes, ventilation problems, or too much water in the compost.

Additional Capital

It is more expensive to set up vermicompost than a usual natural compost. It requires special materials like containers and lime to neutralize the acidity level of the compost. There are also instances wherein you have to buy special worms if the need arises. 

|

Maintenance

Taking care of the worms is a much more tedious job than you think. Here are some things that need to be done:

Do not overfeed

Compost worms get overwhelmed easily. You should not put every organic waste you see in your kitchen, for the worms will not be able to keep up with it. Plus, we also don’t want a smelly garden after all. There is a theory that worms can eat with their weight in a day but a number of factors will still come into play, so there is a tendency that they may eat less than they should. Don’t feed your worms too much, it should be 2-3 days again depending on how much they can handle. Every feeding should be gone by 1-2 weeks depending on your worms and a lot of other factors involved.

Moisture of Bedding

Worms need enough moisture for them to endure. If you put too much water, then they may drown and your pit will have an awry smell to it. If you make it very dry, then the worms are likely to die. To test if there is enough moisture on your soil, squeeze a handful of it, if water leaks out, there is too much water. 

Worms in Compost Are they a Friend or a Foe

Food

Ideally, worms prefer to eat less acidic food and vegetable leftovers in a smaller size. Cabbages take a lengthy amount of time to decompose. Salty, spicy, and processed foods can also spoil the bed emitting a foul smell to your compost. Avoid tomatoes, yogurt, and oily foods for they spoil faster. You can add coffee, tea, and even eggshells as they are preferred for the worms. Bear in mind to cut the food into smaller parts for it to break down at speed. 

Worm Castings

Worm castings should be separated from the worms when harvesting the compost to leave beds for the worms to live. Tray-based bins may take only 10 minutes while the screen should take approximately 30 minutes to an hour while mounds usually take a day to prepare.

Pathogen problems

According to an academic journal published last 2001 titled “Bioresource Technology”, in natural compost, heat is emitted during the process of decomposition, thus making the environment impossible for weed and pathogens to foster. But in vermicompost, worms need enough moisture for them to survive. Thus, the soil from the vermicompost may still harbor pathogens and weeds which will become detrimental to the plants in the long run.  

FAQ’s

Are worms in compost good?

Worms in compost are not only beneficial to the compost, but also to the plants. The worms eat and decompose organic matter. In this way, they make the compost more fertile and the plants grow better. You need to do it right though. Worms can be purchased, but if you don't know what you're doing, you may not get as good results. Worms are also very expensive to buy. They will eat everything and do a better job than most humans at composting.

However, there's a reason why worms are considered the "poor man's compost" - they do not produce heat, and can't be used to warm beds. They do, however, break down organic matter much faster than we can. 

Worms will eat any organic matter that is available to them, including leaves, grass clippings, vegetable scraps, fruit, bread, paper, and even cardboard boxes (if you have a big enough pile). They are like tiny little farmers, turning organic matter into rich, black soil.

So yes, worms are great for composting.

What is the role of worms in composting?

I think it's more important to know what isn't the role of worms in composting. The only thing they do that you can't do yourself is break down wood and other cellulose material. They do this by eating the organic matter, breaking it down into smaller pieces and then excreting the breakdown products. This is known as anaerobic digestion. Anaerobic means without air.

Composting is the process of using living organisms to break down organic material and produce humus. In the case of composting, the worms are the organism that does the actual work. Worms eat organic matter, such as vegetable scraps, kitchen waste, grass clippings, and leaves. They then convert it into a form that can be used by plants, and they excrete a liquid rich in nitrogen and other nutrients.

Worms are not an absolute necessity for any composting system, but they will improve it. They will help aerate the pile, and they will help the compost get to the right temperature for good microbial activity. They can eat plant material that your chickens don't, so they can be a nice way to supplement their diet.

Can you have too many worms in your compost?

You can have as many worms as you want. But, as others have said, the more you have, the less effective they will be at breaking down your compost. You also need to keep an eye on how much moisture your compost is getting. The more moist it gets, the less effective the worms will be. It also depends on how you use them and what kind of compost you are making.

Conclusion

Worms in composts have proved their valuable effect in composting. Although it has also its flaws, it is really up to the gardener’s decision whether he will make these worms as his allies or consider it as something bad in his gardening. How about you? Would you try vermicomposting? Or would you prefer the less-hassle way of composting? DO share your thoughts.

Filed Under: Composting Tagged With: worms in compost good or bad

Best Way to Germinate Seeds in Hydroponics

September 10, 2019 by Josephine Brown

This is one of the questions you will be asking If you are new to hydroponic systems. There are many reasons why you might be considering a hydroponic system instead of soil gardening. For one, hydroponics is a more efficient and hygienic way to grow plants compared to soil.

While you might be a little familiar with how soil system works, you may be unaware of how to get your seeds ready for the grow bed in hydro farming.

Growing from seeds in a hydroponic system is a lot more preferable to transplanting from other mediums. This method helps your plant to be able to resist disease and trauma when they are grown from seedlings.

Germinating seeds in a hydroponic system aren’t at all that difficult. With the right information and a little practice, you can grow your own seeds in a hydroponic system.

Germinating Seeds in Hydroponics

When it comes to germinating seeds in hydroponics, there are a few steps you want to follow and they include

Decide On a Starter

The first thing you want to do is to decide on the type of starter to use. You can choose to use peat, Rockwool cubes, or pellets. Whichever one you choose to use; you want to ensure that they have a neutral pH. This is so as it does not harm your seeds. It also ensures that plants get enough air and moisture in the grow bed.

Best Way to Gerninate Seeds for Hydroponics

Prep Pellets and Cubes in Water

Once you decide on the type of starter to use, the next thing you want to do is to distill it in water. You should prepare your pellets and cubes by soaking them in distilled water for a few hours. If you are looking to germinate a large number of seeds, you will need to use a large container. You want to ensure that your container is large enough to support your Rockwell cubes when they get soaked in water.

You want to check the pH of the water in the container. You can easily do this with a pH testing meter or kit. A pH reading of 5.5 to 6 is what’s required to prevent the Rockwool fibers from damage.

Once the cubes and pellets are perfectly cleaned, you want to drain any excess water from it.

Best Way to Gerninate Seeds for Hydroponics

Seed Cubes and Pellets

The next step is to add seeds to your cubes and pellets. You want to put in a few seeds. This is to improve the chances of any of them sprouting. if you use Rockwell cubes, you may want to put a hole in the top of the cube. Drill to a depth of one inch. Once you’ve made the hole, you can now put your seeds in the hole.

You want to ensure that the hole is tight. This is to prevent light from passing through the hole. Remember that the seeds need to remain in the dark for them to sprout. You also want to check that the environment is properly covered to prevent evaporation and retain water.

Best Way to Gerninate Seeds for Hydroponics

Place Pellets or Cubes in a Tray

After adding the seeds to the cubes and pellets, you want to place your cubes or pellets in a tray. Ensure that there is a distilled water up to a depth of one inch in the tray. You want to use a tray that is able to retain the water. This is necessary so as the cubes with the seeds can remain in a moist environment.

You will then need to cover the tray. You can make use of a plastic dome or a Ziploc bag. Whatever option you choose, you want to ensure that it is dark enough and tightly packed to hold moisture. Once the tray has been properly covered, you can then place it in an area with a temperature of 68F. You may need to use a heating pad to prevent temperatures from falling below this range. 

The seeds are now ready to begin germinating. You will need to be checking on water levels daily if you are in a hot environment. Ensure that the water level doesn’t drop below a depth of 1 inch. You want to avoid adding any form of soil nutrient at this stage.

Best Way to Gerninate Seeds for Hydroponics

You should begin to notice the first set of true leaves after 4 or 5 days. This timeline can vary depending on the conditions if the growing bed. If you have more than one seed in the cube with shoots, you can cut off the one with the smallest shoot.

Once the first sets of true leaves are becoming noticeably. You can now introduce your seeds to light. The reason we didn’t need light before was to prevent the moisture in the tray from drying out. You can move your tray to a window that is facing the light. You want to opt for the red frequency light. This is why a grow light might be a better option. This is because it ensures the even distribution of light frequency when compared to the suns.

Transplanting

It can take up to a month for your seeds to be ready to be transplanted to the hydroponic system. You can easily identify when it is time to transplant once you begin to notice roots protruding from the bottom of your cubes.

You can transfer the entire plant with the cubes into the growing bed. Once in the growing media, you will need to water the plant daily to make up for any depleted moisture during the course of transplanting.

FAQ’s

Is tap water OK for hydroponics?

Tap water is only slightly acidic so it is a safe medium for plants.

It also contains minerals like calcium, magnesium, potassium, etc., which can help to improve plant health. I would use the tap water after running it through a filter to remove any dirt or debris.

How do you germinate seeds in hydroponics?

You can germinate seeds by soaking them for about a day in water. Soak the seeds in a jar with enough water to cover them. Check regularly to make sure they don't dry out. Change the water at least once a day. If you want to speed up the process, put the jar in the fridge and then take it out to warm up before checking.

Can you start seeds in a hydroponic system?

Yes, you can start seeds in a hydroponic system. However, they will not germinate until they are planted into the soil of your greenhouse. The seeds will then be cared for as they grow and mature. If you want to get a jump on the season and have fresh produce before it is ripe, consider starting your plants in a hydroponic system.

Hydroponic systems are also good for those with limited space. For example, if you live in a small apartment or condo, then a hydroponic system might be a better choice than a greenhouse. Hydroponic systems are easy to maintain and require less water. They also provide a safe environment for the plants. You can buy hydroponic kits at any local garden center or online.

How long do hydroponic seeds take to germinate?

You will need to experiment with this. I'm not sure what kind of soil you are growing your seedlings in, but if you're growing them in the same conditions as a regular seedling (water, light, fertilizer, etc) you should be able to see results fairly quickly. Most likely betweeen a span of 3 to 5 days.

How do you germinate tomato seeds for hydroponics?

There are several ways of germinating tomatoes in the hydroponic system.

Here's one example. You need a medium which will allow the seed to sprout and develop roots. The most common one is to use the water in which the seeds were soaked.

But you can also use a liquid medium (the water with nutrients), a semi-solid one, or a solid one. The latter is also called germination substrate. If you use a liquid or semi-solid medium, make sure that it is sterile before adding the seeds.

It is best to soak the seeds for a short time in a solution containing sterilized soil and tap water.

The liquid or semi-solid medium can be prepared by mixing the following ingredients in a bucket: ¼ cup of perlite, ¼ cup of vermiculite, ¼ cup of sand, 2 cups of water, and 2 cups of tap water (or 1/3 cup of baking soda). Mix everything together well and allow the mixture to stand for about 24 hours. After 24 hours, remove the mixture from the bucket and allow it to dry out completely.

Conclusion 

Throughout the course of germination, you want to prevent the growing media from drying out. A dry growing media will prevent seeds from sprouting. you want to also hold off on any fertilizer application in the early stage of germination. It is safe to add nutrients after the seedlings sprout and you notice the first set of true leaves.

I understand that the information here can be a lot for you to comprehend. Especially if you are just starting out with a hydroponic system.

if you have any addition questions or need clarification, feel free to let us know in the comment section.

Filed Under: Hydroponics Tagged With: best way to germinate seeds for hydroponics

  • « Go to Previous Page
  • Go to page 1
  • Interim pages omitted …
  • Go to page 201
  • Go to page 202
  • Go to page 203
  • Go to page 204
  • Go to page 205
  • Interim pages omitted …
  • Go to page 215
  • Go to Next Page »

Primary Sidebar

  • Best Soil for Aloe Vera
  • Tomato Trellis
  • When to Harvest Broccoli
  • Gypsum for Soil
  • Blood Meal for Plants
  • How to Plant Sprouted Potatoes
  • Web Stories

Footer

Growertoday.com is a participant in the Amazon Services LLC Associates Program, an affiliate advertising program designed to provide a means for sites to earn advertising fees by advertising and linking to amazon.com. Amazon, the Amazon logo, AmazonSupply, and the AmazonSupply logo are trademarks of Amazon.com, Inc. or its affiliates.

  • Advertise With US
  • Privacy Policy
  • About Us

Copyright © 2023 Grower Today