• Skip to primary navigation
  • Skip to main content
  • Skip to primary sidebar
  • Skip to footer
Grower Today
  • Home
  • Soils & Plant Nutrients
    • Composting
    • Soil Amendments & Fertilizers
  • Organic Pest Control
  • Natural Weed Control
  • Organic Food
  • Hydroponics

When to Pick Jalapenos: Know the Right Time to Harvest Ripe Jalapenos

April 4, 2023 by Dr. Nyiko C. Mabasa

Do you like a bit of heat if your food? That zang when you bite into your meal. If this is you, you may want to know when to pick jalapenos so you can get the ideal flavor and heat level that you want.

Jalapeno peppers are extremely easy to grow and if you enjoy them, you can grow them at home regardless of the amount of space that you have. Let’s keep reading to find out more.

What Are Jalapeno Peppers?

Jalapeno is a medium-sized chili pepper cultivar belonging to the species  Capsicum annuum. These peppers grow fairly slowly and because of this, it can be quite tough to tell when they are ready for harvest.

The peppers are a summer favorite for gardeners everywhere. They add some spice to dishes without the overwhelming heat that some peppers have. Give them a good amount of heat and sunlight and they will grow happily and produce a pepper with a lovely mild taste that can be used in many dishes such as salsas, stir-fries, and nachos and to make the sauce.

Jalapenos can easily be grown in containers and on the ground. So even if you don’t have a lot of garden space, you can still be able to grow and enjoy these peppers at home.

Jalapeno plants produce a large yield of dozens of glossy green fruits that are easy to grow if provided with the right growing conditions.

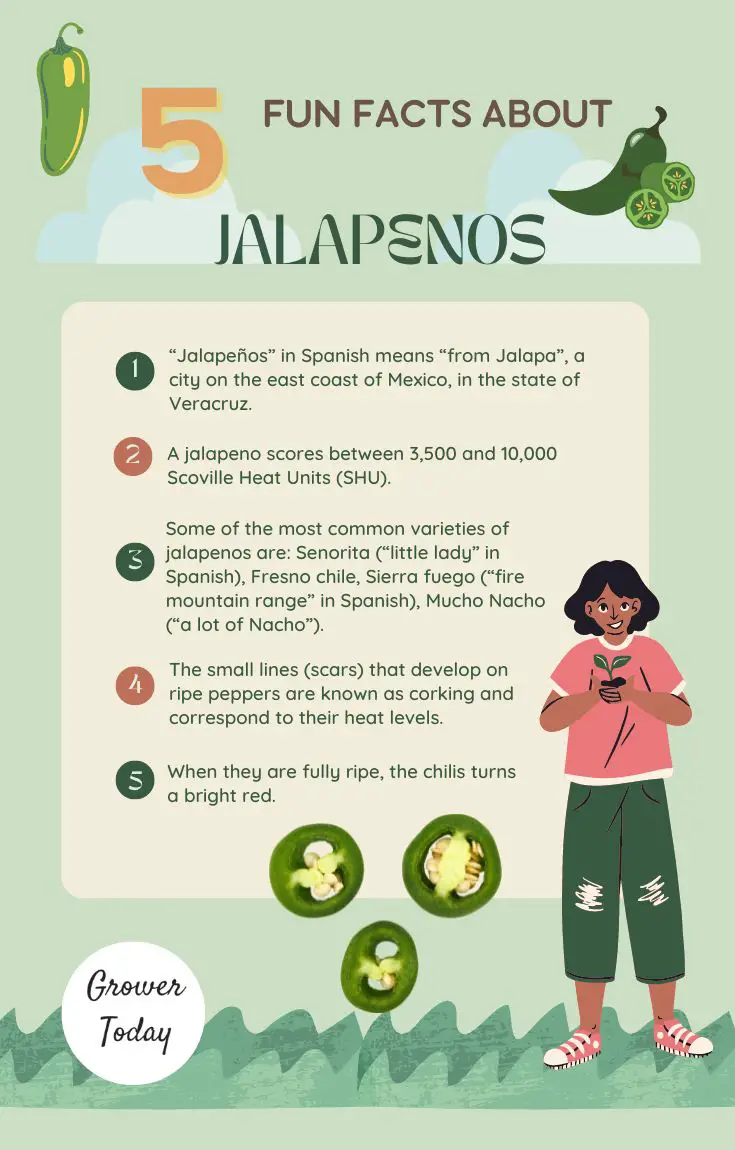
On the Scoville scale, which is the measure of the hotness or spiciness of peppers, they are in the range from 2500 to 8000 and are considered mildly hot. The compound capsaicin gives hot peppers their heat. When jalapenos are fully ripe and have a red color, the level of capsaicin is higher and results in the peppers being hotter than when they are still green.

Harvesting Jalapenos

Harvesting jalapenos is an easy process. If you follow the guidelines that will be provided in this article, you can confidently harvest them right.

Continual harvest of peppers is good for them and will encourage the plant to keep producing more. Therefore, it is impossible to use up peppers by picking them often. As long as you harvest them, they will keep blossoming and producing more peppers.

On the other hand, if you leave the peppers too long on the plant, your red jalapenos will start to rot or will not last very long after you pick them.

No matter the color of your papers when you pick them, always pick them before the frost falls. Peppers are a summer crop and are therefore very sensitive to cold weather. They may suffer frost damage if the temperature falls below 40 degrees Fahrenheit.

If you are not quite prepared to harvest your peppers or they are not quite ready as the cold weather approaches, you can cover the entire plant with fleece covers. This way you might be able to save the peppers from damage.

How Do I Know When My Jalapenos Are Ready to Pick?

When it comes to harvesting jalapenos, when do you know or decide when your peppers are ready to pick? You pick your jalapenos when they are the right color depending on the level of heat you want.

Jalapenos turn red as they mature, and as they mature their level of heat increases. Most people prefer to harvest their jalapenos when the fruits are dark green and only have mild heat.

If you are unsure that your green jalapenos are ready for harvest, check their appearance. They should be picked when they are about 3-5″ in size, and feel firm to the touch.

How to Tell When Jalapenos Are Ripe

Telling when jalapenos are ripe can be tricky because they are usually harvested off the same branch and start in. And if you grow them at home, you may have a different variety to the ones you find at the store so they may look different.

When you plant your own jalapenos at home, start harvesting them when they are about 5 to 6 months old. After this period, the peppers should be at least 3-5 inches long. They are then ripe and ready to harvest. The exact length of the pepper will depend on the variety you are growing, as well as the growing conditions that you have provided for them.

If your plants are grown in an area that does not receive a lot of sunlight, they may be smaller and take longer to mature. Regardless of size, mature peppers are deep green or red, as soon as they get these colors, they are ripe and ready to pick.

How to Harvest Jalapenos – Simple Guide

Once you have ascertained that your peppers are ready to harvest, you need to do it properly so that your plants keep producing fruit. Here are the steps you need to follow;

1. Locate the peppers that have your desired heat level

Green jalapenos will have a mild flavor. The lighter the shade of green, the milder the pepper is likely to be. As the peppers mature and get a red color, they get hotter. The redder they are, the more heat they will have.

2. Hold the branch that has the jalapenos you want to harvest

This is so that you can support the stem while plucking the peppers so that it does not break.

3. Cut off the pepper

With your free hand, use a pair of sharp running shears or garden scissors to cut off the pepper at the base where it attaches to the main stem. While doing this, do not give in to the urge to tug on twits the peppers of the plant even if they give you a hard time. This may end up leading to damage to your plant.

jalapenos facts

When to Harvest Jalapenos

Knowing when to pick jalapenos off the plant is important to get a good harvest. Jalapenos take anywhere between 70 and 85 days to mature, from the day they are transplanted outside. At this stage, they should have a firm texture, have dark green pods, and be 3-4 inches long.

If you are looking for mild heat from your peppers, pick the younger green ones off the plant. The younger ones will have a light green color and will not have any corking, which is the appearance of little stretch marks on the body of the jalapeno.

When jalapeno peppers grow fast, the skin has to stretch quickly and this results in the pepper having little lines or striations on them. When you see these marks on the pepper, that is a clear indication that it is ready to pick and healthy.

Different jalapenos have different levels of heat. If you prefer mild to no heat, the best varieties to go for are the Mammoth Jalapeno, TAM Jalapeno pepper, or the heatless Coolapeño pepper. You can get seeds for many of these varieties on the Etsy online marketplace.

Can You Ripen Jalapenos Indoors?

If you can not wait for your jalapeno peppers to mature while still on the plant, or if a branch with some peppers that have not ripened breaks off, you can harvest them indoors.

Jalapenos can be ripened off the vine. This process can take period of a couple of days to a few weeks. The speed with which this happens will depend on various conditions such as the ambient temperature in which they are kept, as well as whether the peppers themselves have started changing color.

Jalapenos, just like other peppers can ripen indoors, on a windowsill or countertop. The ideal temperature to get this to happen is at least 70 degrees Fahrenheit for quick results.

If the peppers are at the end of the growing season, you can cut off branches with immature jalapeno peppers and hang them upside down indoors, or stick them in water to speed up the ripening process.

Keep in mind however that after your peppers have been harvested, they will no longer grow in size. They will only ripen but remain the same in size.

How to Preserve Jalapenos

Depending on the size of your harvest, as well as how long you would like to store your jalapenos, there are various methods that you can use to preserve them. These are;

  1. Refrigeration: If you plan to consume your jalapenos in about two weeks, you can store your peppers in a ziploc bag and store them in the vegetable drawer of your fridge. Make sure that both the peppers and storage bag are completely dry before you store them
  2. Freezing: You can store jalapenos in the freezer for up to eight months. Before freezing, wash and dry them carefully and store them whole in freezer bags. You can use your frozen peppers in stews, soups, and other dishes. You will obviously have to thaw them out before doing so, and they may lose a bit of crunch from when they are fresh. Just keep them in mind. If, for whatever reason, your frozen peppers start to turn black before you consume them, toss them away as they may no longer be suitable to eat.
  3. Food dehydrator: dehydrated jalapeno peppers can be stored for up to a year. To prepare them, thoroughly wash and dry them with a dry towel or let them air dry. Cut your washed peppers into even pieces. Ly them on a flat tray and make sure that they do not overlap so that they can dry properly. Dehydrate your peppers at 125 degrees Fahrenheit for 6 to 12 hours. You will see that your peppers are completely dry when they become leathery (if you want to rehydrate later), or when they get brittle (if you want to grind them into powder). Store your dehydrated peppers in sealable containers and keep the, away from the sun.
  4. Pickling: Some gardeners prefer to pick their jalapeno peppers early. Green jalapenos are crispy and crunchy and are great for pickling. So if you want to pickle your peppers, pick them when they are still young and green, and you can keep them for as long as you like.

When you harvest your peppers for storage in whichever method you prefer, yous should also consider saving some seeds for the next planting season. This will save you money and the trouble of having to look for new seeds or seedlings.

Another advantage of growing jalapenos from your own seeds is that those peppers will be better adapted to your growing environment, and will have a higher chance of survival and production with each passing growth season.

Conclusion – When to Pick Jalapenos

Jalapenos are an extremely easy crop to grow. You can grow them both indoors and outdoors, as long as you can provide ideal growing conditions for them, they will grow beautifully and successfully.

Harvesting jalapenos is an important factor in their growth and getting a successful harvest. Knowing when and how to harvest your peppers is absolutely crucial if you want your plant to keep producing. Knowing what indicators to look out for, that show that your peppers are ready for harvest will determine the quality of your crop, as well as how long your plant will keep growing.

If you like a mild eat on your peppers, harvest them while they are still young and green in color. If you love hot peppers, wait for your peppers to turn red because at thing stage they will have a lot of heat.

Pick your jalapenos often so that they can keep producing more fruit for you to enjoy. Do not worry about any possibility of having too much fruit, because you can always store your peppers for as long as you with with the different methods provided in this article.

Never wait for all your peppers to ripen before harvesting them, as this will slow down the growth and productivity of the plant. Keep harvesting for it to keep growing. You cannot out-pick the plant.

We hope you found all the information, tips and tricks pin this article useful, and you will not confidently grow and harvest your jalapenos knowing that you are doing it right.

Happy growing!

Filed Under: Organic Food, Plants, Tips & Guides Tagged With: "how to tell when jalapenos are ripe, how to harvest jalapenos, when to harvest jalapenos, when to pick jalapenos, when to pick jalapenos off the plant"

Know the Best Time to Pick Potatoes [Potato Harvest Time]

April 3, 2023 by Dr. Nyiko C. Mabasa

Homegrown potatoes are arguably better than anything you can buy at a supermarket. Growing them however can be a bit tricky if you are inexperienced. One of the key things with growing them at home is to know when to pick potatoes.

Knowing how to harvest and handle homegrown potatoes after harvest will help you to end up with the maximum possible harvest your garden can produce. You will also be able to store them for a long, even through the winter months. To get to know when to pick potatoes, keep reading.

The Potato Plant

Solanum tuberosum, commonly known as potato is one of the most commonly grown and consumed vegetables worldwide. It is a staple for many traditional dishes and is used to make many fast food dishes and snacks.

Potatoes are a cool-weather vegetable and can be grown as a winter crop in areas with a warm climate. They belong to the nightshade family of plants which also has peppers, tomatoes, and eggplants.

The potato plant has green leaves that grow on top of the soil and help you to see where your potatoes are planted. It also has a tuber, which is the enlarged underground portion, which we refer to as “the potato”. The tuber develops underground once the plants get to about 6-8 inches in height. This usually happens around 5-7 weeks after planting.

There are over 100 types of potatoes. They differ in skin and flesh colors, shapes, and sizes. Some of these are ideal for mashing, roasting, frying, and for making salads. Potatoes are also nutritious. The skin is especially nutrient-rich and provides u to 45% of an adult’s daily vitamin C and 18% potassium requirements.

Growing Potatoes

Potatoes will grow well as long as they are provided with the right growing conditions. They do well in most types of soils and will produce a lot of good potatoes for your harvest.

Grow potatoes in an area where they will receive at least 6 hours of direct sunlight. The soil should be fertile, loose, and well-draining. Refrain from using any hard or compacted soil as it will lead to disfigured potatoes and will make harvesting difficult when the time comes. You can improve the quality of the soil by adding compost, and soil amendments, and preparing the soil before planting.

The ideal soil pH for growing potatoes is acidic and should be between 5.8 and 6.5. The temperature should be 45 to 55 degrees Fahrenheit.

The best time to plant potatoes is in the spring 2 to 4 weeks before the frost day in your area. The temperatures should still be ideal at this time. If planted at the right time, you should expect to harvest them late in the summer and can store them through the fall and winter months.

Harvesting Potatoes

Harvesting potatoes can seem tricky, but it is pretty simple if you know what you are doing. Knowing when to pick potatoes is also key. They are best harvested on dry days as harvesting in the mud when it is raining may cause issues. Since you cannot see the tubers underground while you harvest, you need to be extremely careful not to puncture the tubers. If the soil is loose, it should be pretty easy to maneuver with your fingers, this will help you to avoid cutting on causing bruising on the skin of the potatoes.

Potatoes can tolerate light frost, but when the first hard frost is expected, it’s time to get out the shovels and start digging potatoes.

Knowing the right time to harvest potatoes and doing so will keep the vegetables from sitting too long in the ground, and will reduce the chances of attack by pathogens that target potatoes.

The size of your tubers should be about the size of a chicken egg or bigger when you harvest them. You can leave them to grow a bit more if you prefer. You should use a digging fork from around the edges and work your way into where your potatoes are planted. This should help loosen the soil without puncturing the potatoes. Once the soil has loosened, you can use your fingers to feel around and get the potatoes that you want out.

Here are some considerations to keep in mind when harvesting potatoes:

  • Toughen up your potatoes for storage before harvesting them, by limiting how much you water them after the middle of August.
  • Before harvesting your entire crop, dig up a small test hill to see how big or mature your plants are. The skin of mature potatoes will be thick and firmly attached to the potato flesh. Those that are still young will have thin skin that comes off the potato when gently rubbed.
  • If the soil is wet when you harvest the potatoes, let them air dry completely before storing them.
  • Check for any green pots on your harvested potatoes, if it is just superficial and can be trimmed off, the potatoes should be fine to keep. If the green goes deep into the flesh, throw away the potatoes as they may be poisonous.
  • Cure your potatoes before long-term storage. Do this by letting them sit in temperatures of 45 to 60 degrees Fahrenheit for about two weeks. This time will give the potatoes time to heal or harden any small cuts that may be present. You do not need to cure them if you are going to eat them right off the ground.
  • Store potatoes in a cool, dry, and dark place after harvesting. Too much light will turn them green, rendering them unsuitable for eating.
  • Store the potatoes that are damaged, diseased, or bruise-free to avoid any storage problems.
  • Store your potatoes in baskets, cardboard boxes, or crates with holes on the sides so the vegetables get enough ventilation to prevent rot.
  • Regularly check on your stored potatoes and remove any ones that may get damaged or start to rot before they infect the others.

harvesting potatoes

When to Harvest Potatoes in Containers

Whether you are harvesting potatoes from the ground, grow bags, containers, or grow beds, the method to follow is the same. When to pick potatoes, and how exactly to do it, will be the same.

Once your potato plants start to flower, you know it is almost time to harvest. Wait for a bit, just until the flowers start to dry and drop off the plant. After this happens, the potatoes will remain tender for about 2-3 weeks.

If you prefer to pick your potatoes at this stage, keep in mind that you will need to eat them soon after harvest as they do not store well. They are delicious but have really thin skins that affect their shelf life.

To harvest larger, more mature potatoes, you should leave them for longer than this in the soil. Growing them in a potato grow bed will help you easily monitor the size of your potatoes.

Check Price on Amazon

The longer you intend to let your potatoes grow for, the more you will need to protect them from animals, children, and pets so they can grow and mature well.

Because potatoes can be damaged by frost, you should always harvest them just before the frost hits, whether they are mature or still in their baby stage.

How to Know When Potatoes Are Ready to Harvest

So how do you know the best time to pick potatoes? Knowing when to harvest potatoes can be quite easy. Once the potato tubers have started to set, they are ready to harvest. You will know that they have reached this stage when you notice them flowering.

To harvest baby potatoes, dig up potatoes just as the plants have started to flower. Wait until the tops of the vines have completely died to harvest full-size potatoes. This shows that the plant has now directed all of its energy into growing the tubers.

As you figure out when to pick potatoes, watch out for other symptoms of disease with the die-off of your plants, as not all browning and die-off are part of the plant’s natural cycle.

Potatoes can tolerate light frost, however, when the first hard frost is expected you should pull off the shovels and start digging potatoes. So you should harvest all your potatoes before the frost hits or you might lose your crop.

If you do not harvest your potatoes, you will create a perennial patch of potatoes. Potatoes left in the ground and not harvested will either grow new plants, or sprout and produce new plants in the spring of the following growth season. Which of these happens will depend on the climate where you live.

How to Store Potatoes

How you store your harvested potatoes depends on the size of your harvest and how long you intend to store them for. If you are harvesting potatoes to consume within a few days, storage should not be a concern as you can store them anywhere.

To store them for longer, however, you should find them some space in a cool place with temperatures of between 38 to 40 degrees Fahrenheit. If you store them in a warm place, they will be susceptible to diseases, decreasing their shelf life.

The storage space for potatoes also needs to have a humidity of about 80%, or the tubers will wither and dry out.

Make sure that the place is also not exposed to sunlight as this will cause the greening of the potatoes. Fresh air and ventilation are crucial for storing potatoes, airtight containers should not be used.

Never store potatoes with apples. The ethylene gas from apples will cause the potatoes to spoil.

Avoid storing potatoes in the fridge. This is because after potatoes are harvested, they convert starch to sugar depending on the temperature. They will do this if stored in the fridge, and the potatoes taste weird. Another reason is that storing potatoes in the fridge leads to an increase in the levels of acrylamide. This compound is produced when you cook potatoes at high temperatures. Acrylamide causes cancer in animals, so there is a good chance it might also be harmful to humans.

Depending on the variety, potatoes can last 4-6 months if stored well.

Conclusion – Know the Best Time to Pick Potatoes

Growing and harvesting potatoes at home is one of the most satisfying things to do. Digging them up makes for a fun activity that can be done with kids. Knowing when to pick potatoes and the best method to harvest will ensure that you get the best harvest and can store your potatoes well if you wish.

We hope you found this article on how to know the best time to pick potatoes informative and helpful.

Happy growing.

Filed Under: Organic Food, Plants, Tips & Guides Tagged With: how to know when potatoes are ready to harvest, when to dig up potatoes, when to harvest potatoes in containers, when to pick potatoes

Does Potting Soil Go Bad? (4 Important Signs to Look Out For)

April 3, 2023 by Dr. Nyiko C. Mabasa

Potting soil is important to provide a growth medium, moisture, and nutrition for any growing plants.  There are different types and qualities of potting soil, and if you find good ones you may be tempted to buy a lot. The answer to the question, ‘does potting soil go bad’ is important to know if you plan to store it for long periods. To find out the answer to this question, keep reading.

Potting Soil Composition

Potting soil is a vital component of any garden. Unfortunately, it can go bad over time, rendering it unusable and unsuitable for plant growth.

Commercial potting soils usually contain peat moss as the primary ingredient. It can also contain other ingredients such as perlite, vermiculite, and pine bark. All these components have different functions;

  • Peat moss – a fibrous material that contains nitrogen and phosphorus which are nutrients required for plant growth
  • Perlite – helps with aeration, water retention, and drainage in the soil
  • Vermiculite – improves the nutrient content of the soil and water retention
  • Pine bark – improves moisture retention and aeration
Check Price on Amazon

A good potting soil should be able to hold water and nutrients that will be used by plants for growth. In some instances, it can even be enhanced with fertilizer or water-holding crystals which will help your plants to perform well. The ratio of the different components of potting soil can be varied and adjusted depending on the plants that will be grown in it

Potting soils are usually cheap, hence people can purchase large quantities at a time. They are also lightweight and easy to bag and sell.

It is different from the soil in your garden which is natural. Garden soil is made up of sand, silt, and clay, and can also contain organic matter particles such as those from leaves and grass clippings.

Old potting soil loses value over time as its ingredients, like peat moss, decompose faster than organic materials, hence potting soil loses its quality faster than regular garden soil.

Do you know what is the difference between Perlite vs Pumice and Which is The Better Soil Amendment?

How Long Does Potting Soil Last?

Potting soil can go bad – but it doesn’t happen overnight. The rate at which this happens depends on a few factors.

Open bags of new potting soil can stay for between 6 and 12 months without losing its quality. Unopened potting soil however stores even better and can last for up to a year or two before it goes bad.

Potting soil that is used to grow plants will usually go bad after about a year, or a single growing season. After this period, the soil will no longer be able to support the growth and health of plants and will either need to be replenished or replaced.

Read more about A Step By Step Guide On How To Sterilize Potting Soil

Facts about potting soil

How to Tell If Potting Soil Is Bad – The 4 Signs to Look Out For

You should be able to tell when potting soil has gone bad, here are the 4 important signs you should look for;

1. Off smell

If you notice a rotten egg smell coming from your potting soil, it may be because it has gone bad. This bad smell is caused by anaerobic bacteria and sometimes fungi that grow in old, damp, and compacted soils.

Putting your damp soil out in the hot sun may help to kill some of these bacteria and fungi that break down the soil. You have to be careful however because this can potentially destroy some of the nutrients that are in the potting soil. Some potting soils also have beneficial social microbes added to them, and the process of putting the soil in the sun can kill them. This would only be a concern for specialty potting soils, it is however something to keep in mind.

2. Insects and pests

Bugs and other types of insects are attracted to decaying organic matter. So if you see these infesting your potting soil, it is a sure sign that it is no longer in good condition.

The most common insects that infest rotting potting soil are fungus gnats. These feed on decomposing or decaying organic matter. They deplete nutrients in the soil and damage plant roots, and as a result, the soil will not be suitable for plant growth.

To deal with this issue, you can add diatomaceous earth to your potting soil and it will kill the bugs in there.

3. Mold development and growth

Mold grows on the top surface of the potting soil, especially when the soil has been exposed to damp or moist conditions for an extended period of time, without sufficient ventilation. The mold can be white, grey, yellow, or green in color, and can also have a fuzzy and slimy texture.

If you see mold growing on top of your potting soil, let it dry out in a place that has adequate aeration. Check the soil after a couple of days to see if it is still moldy.

Moldy potting soil can cause the roots of your plants to rot, and dampen off young seedlings if used.

4. Soil compaction

As potting soil breaks down in quality, it starts to form clumps. This is because of the decomposition of peat moss. The soil starts to compact and becomes dense. This then creates drainage and aeration problems and makes it difficult for roots to grow.

If you would like to continue to use the potting soil that is obviously breaking down in quality, you can add some goodness back into it by mixing in some organic matter such as compost or some more peat moss.

Does Potting Soil Expire?

Potting soil can lose its quality over time if it is not used and kept in unfavorable conditions. To keep it in good quality for longer periods of time, keep it in an airtight bag that is free from moisture, and away from sunlight.

Does Unused Potting Soil Go Bad?

Unused potting soil can go bad but it doesn’t happen overnight. Old potting soil loses value over time as its ingredients, like peat moss, decompose.

The range of time it takes potting soil to go bad is anywhere between 1-3 years. For unopened and unused potting soil, you can store it for about a year or two before it goes bad.

If unused potting soil has been stored in a shed or a garage and has come into contact with water, it is probably best to throw it away. Potting soil can go bad if not stored properly.  If it is still dry, however, it may still be viable for growing plants.

Problems With Using Decomposed Potting Soil

Decomposed potting soil not only looks and smells bad, but if used in that state it will cause various problems that will disrupt or even impede the growth and productivity of plants. Here are the 4 problems associated with using decomposed potting soil:

Reduced plant growth:

Decomposed potting soil contains much fewer nutrients than fresh potting soil. If it is used to grow plants, they will have stunted growth, weak leaves, and delayed flower and fruit development.

Compressed/compact potting soil:

The potting soil will compress or compact as the peat moss breaks down. It will pack around the roots, resulting in the impediment of water and oxygen flow. This will lead to eventual ill health and even the death of plants.

Reduces soil drainage:

The compaction of potting soil will disturb drainage. This will lead to water-logged conditions and the plant roots will not be able to breathe. Plants require well-drained soils to be able to grow efficiently and healthily. If a plant is placed in permanently soggy or water-logged soil, it will die.

Salts build-up:

Fertilizers and salts build in the soil. This becomes even worse if the soil has poor drainage. This build-up will eventually kill the plants, especially if the plants cannot withstand high salt concentrations. The fertilizer build-up will result in fertilizer burn on the plant leaves.

How to Revive Old Potting Soil for Plant Health

While using old or decomposed potting soil will do more harm than good to your plants, not all hope is lost as it is possible to revive the soil. Here are some of the options you have;

1. Repot plants every year:

Because potting soil usually lasts for a year or a single growing season, to give your plants the best chance of good growth and health, repot them every year and give them new potting soil

2. Improve the bagged potting soil:

To potting soil that is still in a bag but has been sitting for a long time, you can add a few handfuls of perlite or vermiculite to revive it. This will not keep the peat moss from breaking down but will help keep the soil aerated. You can also add a handful of compost or worm castings to give it a boost of nutrients.

3. Flush the soil monthly:

Flush the potting soil monthly with fresh water to remove or slow down the accumulation of fertilizer and salts in the soil. This will also help to remove the mineral deposits from tap water if you use it to irrigate.

4. Make your own potting soil:

To save yourself the trouble of having to deal with decomposed potting soil from a bag, you can make your own mix with more organic ingredients from the garden. you can make your own mix with compost, coir (an organic alternative to peat), worm castings, vermiculite, and other soil additives that you can find. This may seem like a lot of effort, but it is completely worth it and will last longer than commercial potting soil mixes.

How to Store Potting Soil

Potting soil can go bad if not stored properly, to make it last longer, you will need to know how to store it well.

Keep any unused potting soil completely dry. If it comes into contact with any moisture, it will start to develop mold and mildew which will damage the quality of the soil.

You can also store it in a plastic container with a watertight lid or an unscented plastic bag. Place it in a cool, dark place in a water-safe room.

For unopened and unused potting soil, you can store it for about a year or two before it goes bad, and opened bags will last 6-12 months.

Conclusion – Does Potting Soil Go Bad?

Potting soil is worn out because the peat moss has decomposed. If you want to continue to use the soil or want to give your plants the best chance at growth even after the first growing season, use the measures outlined above to replenish or replace the potting soil once every year.

Providing your plants with good quality or fresh potting soil or maintaining the quality of the soil that is already in use will result in your plants being much healthier and growing better.

If you notice or suspect that your potting soil is going bad, it is better to be safe than sorry for the sake of your plants. Do not use it, rather get fresh potting soil or make your own mix.

We hope this article provided you will all that you needed to know about potting soil going bad.

Happy growing!

Filed Under: FAQs Tagged With: does potting soil expire, does potting soil go bad, how long does potting soil last, how to tell if potting soil is bad

How to Harvest Kale So the Leaves Keep Growing

April 3, 2023 by Dr. Nyiko C. Mabasa

Kale is one of the easiest and best leafy greens to grow currently. Also dubbed a superfood due to its many health benefits, if you’re a health enthusiast, you definitely want to know how to harvest kale so the leaves keep growing and give you a continuous harvest.

To learn how to do this right, let’s keep reading.

Summary: How to Harvest Mature Kale

To harvest Kale, grasp the stem of the mature outer leaf at the base of the main stalk and pull down and out, away from the center, until it breaks. Ensure that you leave at least 5 central leaves on the plant so that it keeps growing.


What is Kale?

Brassica oleracea var. sabellica, commonly known as kale is a leafy green vegetable that belongs to the cabbage family and is grown for its edible leaves.

Mostly eaten raw in salads, but can also be eaten cooked, kale has a variety of micronutrients such as vitamins A, C, and K, minerals, antioxidants, carotenoids, glucosinolates, and polyphenols, all of which are beneficial to human health.

If you plant kale at the right time, you will have a long season of harvest which will give you ample time to enjoy your fresh greens. Kale is typically a cool-weather vegetable but you can get a longer harvest if you plant it late in the summer to harvest in the fall and winter. It is also surprisingly hardy and frost tolerant. Certain cold-tolerant varieties will keep growing as long as the weather stays above 20°F.

This plant produces so many large leaves that when it is mature, it takes you only a few minutes to gather enough for a nutritious meal.

Most varieties of kale are biennial, meaning they have a two-year life cycle but people mostly grow it as an annual with a one-year growth cycle. Some kale varieties are perennial and can live for 5-7 years.

When to Harvest Kale

Kale is as easy to harvest as it is to grow. However, you need to know exactly the method and the right time to harvest it. So when is the best time to harvest kale? Well, this will depend on the variety or cultivar of kale that you are growing as they have different rates of growth.

There are also two distinct harvesting stages of kale, baby kale, and mature kale. The timing of the harvest will depend on what stage you want to harvest the leaves at.

Kale typically matures approximately 60 days after the seeds have been planted in the soil. By the time healthy plants reach this point, they will have at least 10 leaves with the larger ones on the outside and the smaller ones on the inside.

If you want to harvest your kale leaves while they are in the baby stage, this is best done 25 to 30 days after planting the seeds.

Kale is usually harvested in the late spring months, early summer, and again in autumn.

The time of harvest can also depend on the growing zone you are in and the time of the year. If you have a climate that greatly favors kale growth, you can harvest kale every one or two weeks.

Some kale gardeners even like to plant kale in the fall so that it can go through a frost before harvesting. The cold weather causes the plants to convert their starches to sugar, which greatly improves their taste.

How to Cut Kale From Garden

Harvesting kale is an extremely simple process. You can easily cut off the individual leaves without damaging the entire plant. This is as long as you don’t cut the central bud.

Here are the considerations to keep in mind when harvesting kale from the garden;

  • Cut off the leaves where the leaf stem meets the main stem of the plant – instead of cutting, you can also break the leaves from the stem by pushing it down with your thumb and pulling it away from the plant.
  • Do not cut the main stem of the plant – if you cut the team off, the plant will stop producing
  • Leave about 1/3 of the leaves on the plant so that it can regenerate over time – pick as many leaves as you want from the kale plant, but do not leave it bare if you wish to continue harvesting
  • Do not cut the root of the plant – this should go without saying, but if you cut the roots of your kale plant it will die
  • Pick the largest and oldest leaves first – this will give the younger plants time to grow before they can be harvested
  • Use the same method whether you are harvesting kale in the baby or the mature method – this way, your kale will keep growing
  • While harvesting, watch out for and remove yellow or spotted leaves – remove any yellow or spotted leaves as soon as you notice them. Leaving sick or dead leaves on the plants will take up energy that the plant should be channeling toward healthy growth to extend your harvest. If you consistently spot any yellow, spotted, or wilted leaves on your plants, it could be a sign of distress. Check for any possible causes such as common kale pests like cabbage worms and aphids, overwatering, or a nutrient deficiency. Once you have established what the cause is remedy it as soon as possible to give your plant the best chance of survival. If it is a watering issue, adjust your watering schedule, if the cause is pests, include pest control in your maintenance routine, I recommend you read the article Amazing Natural Insect Pest Control Methods that Works.
harvesting kale

How to Harvest Baby Kale

If you’re growing baby kale for use in salads, the best time to harvest them is 25-30 days after planting. The best variety for baby kale is the Red Russian and it is commonly grown for this purpose

Wait until the plants have multiple leaves that are about 2-3″ in length. Just keep in mind that when you harvest the leaves smaller, the yield per plant will also be smaller.

To harvest small kale leaves, simply use your fingers to pinch each individual leaf at the base of the stem. You can also use a sharp pair of scissors or a knife to cut the leaves. Grab a handful of leaves and cut them off about two inches above the ground. This will enable your plant to keep growing as long as you keep the central point intact.

To keep harvesting young kale leaves, watch them carefully for about 3-4 weeks because kale can quickly outgrow the baby stage.

How to Harvest Mature Kale

Full-size, grown, or mature kale leaves have a tougher texture and a stronger flavor than baby leaves. Older leaves can become discolored and eventually fall off the plant. If you notice this happening, remove these leaves and only harvest the ones that still look green and healthy. When you pick mature kale leaves, ensure that you leave at least 5 central leaves on the plant so that it can continue to make food via photosynthesis and keep growing.

For mature kale leaves, it is best to cook before consuming them or use them to make kale chips. You can also massage them thoroughly before eating them if you don’t want to cook them

When they’re mature, they should be about the size of an adult’s palm or bigger. To harvest them, grasp the stem of the mature outer leaf at the base of the main stalk and pull down and out, away from the center, until it breaks. Repeat the same process until you have harvested all the leaves that you want. If your plants are still new or you are worried about damaging them, you can also use a knife, scissors, or running shears instead of your hands to harvest. This will help to prevent snapping the stem.

Kale Growth Period

Kale days to harvest is about 55-60 days after planting, as that is the regular period it takes to mature. If the kale is planted from seed in the soil, however, it can take closer t 3 months before they are full-sized.

How to Store Kale after Harvest

Freshly picked kale leaves can be stored and last up to 2-3 weeks in the refrigerator if stored well. Do not store it without protection in the fridge because it will quickly wilt. Put the leaves in a ziplock plastic bag or a storage container.

Kale can also be frozen, and last about 4-6 weeks before turning bitter. To do this properly, wash and chop the leaves before freezing them.

If you want to keep kale in the freezer for more than 6 weeks, you can blanch it before freezing. This way it will store for about 8-12 months.

Whichever way you decide to store your kale, follow these basic preparation steps:

Step 1: Wash

Wash all the harvested kale leaves thoroughly with cold water, because hot or warm water will make them wilt, and you want to maintain the crunch.

Step 2: Cut

Remove or cut off the stems, unless you want to eat them.

Step 3: Dry

Pat the leaves dry with a towel or let them air dry for about 10 minutes.

Step 4: Put them in a bag

Put the clean and dry leaves in a resealable storage bag or container, with a piece of paper towel to absorb moisture and prevent it from damaging the leaves.

Step 5: Squeeze out the air

If you’re storing them in a bag, squeeze out as much of the air as you can.

Step 6: Store

Store the leaves in your preferred place. If the leaves go yellow before you eat them, throw them away.

You can grow many other green leafy vegetables like Spinach or Lettuce

Conclusion – How to Harvest Kale So the Leaves Keep Growing

Kale is a nutritious vegetable and can be used to prepare delicious dishes with a bit of information. Knowing when and how to harvest kale is also important, depending on what you plan to use them for. This article provided you with all the information you could ever need on how to harvest kale so the leaves keep going, kale days to maturity, and how to store your harvested kale. We hope that you found it very helpful and will now go and grow your kale and harvest it properly for long periods of time.

Happy growing!

Filed Under: FAQs, Organic Food, Plants Tagged With: how to cut kale from garden, how to harvest kale, How to Harvest Kale so the Leaves Keep Growing, kale days to harvest, kale days to maturity, when to harvest kale

  • « Go to Previous Page
  • Go to page 1
  • Go to page 2
  • Go to page 3
  • Go to page 4
  • Go to page 5
  • Interim pages omitted …
  • Go to page 215
  • Go to Next Page »

Primary Sidebar

  • Best Soil for Aloe Vera
  • Tomato Trellis
  • When to Harvest Broccoli
  • Gypsum for Soil
  • Blood Meal for Plants
  • How to Plant Sprouted Potatoes
  • Web Stories

Footer

Growertoday.com is a participant in the Amazon Services LLC Associates Program, an affiliate advertising program designed to provide a means for sites to earn advertising fees by advertising and linking to amazon.com. Amazon, the Amazon logo, AmazonSupply, and the AmazonSupply logo are trademarks of Amazon.com, Inc. or its affiliates.

  • Advertise With US
  • Privacy Policy
  • About Us

Copyright © 2023 Grower Today